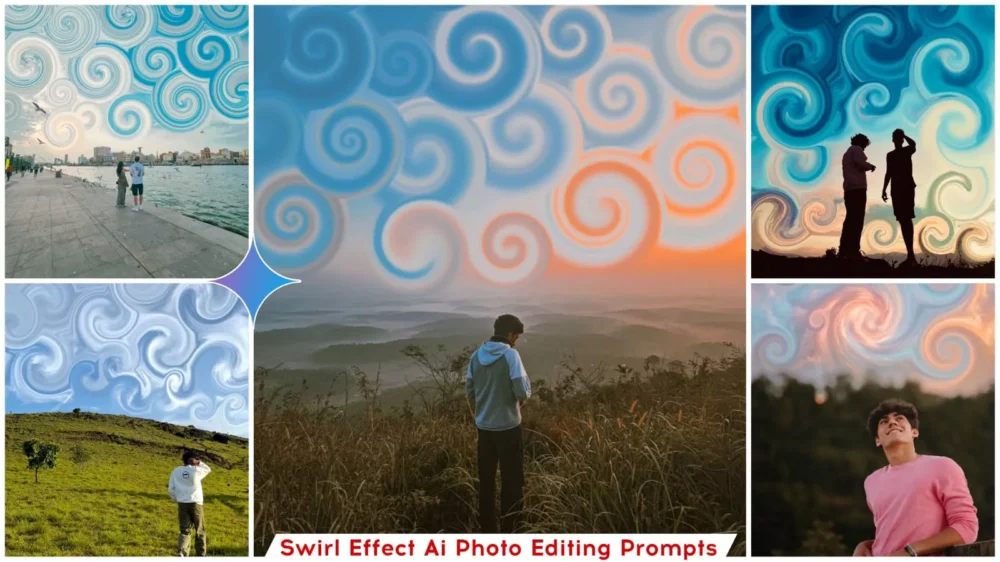
Swirl Effect Ai photo Editing Prompts – Nowadays, if you open Instagram, you will come across a new editing trend in almost every other photo. These images depict clouds swirling around in a circular pattern—something that is, in reality, achieved through editing. You cannot simply capture a photograph like this directly; you must either edit it or generate it. In this article, I will explain both of these processes to you, as I possess expertise in both areas. I will show you how to create such photos using the best prompts, and I will also identify the applications where this can be done with ease. I will guide you through the entire process step-by-step—simply follow along to create your own!
Details Of Swirl Effect Ai photo Editing Prompts
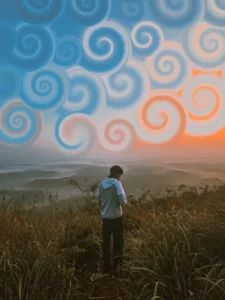
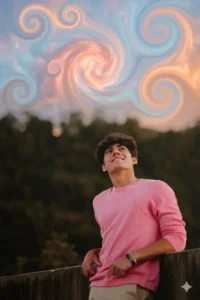
So, how exactly does this “Swirl” effect work? What does it look like, and what visual impression does it create? Let me explain. With this effect, you will see elements in the sky appearing to rotate—it creates the distinct impression that the entire sky is swirling around in a circular motion. Furthermore, it introduces a sense of motion illusion into an otherwise static photograph; for instance, while the subject of your photo remains stationary—just as you appear in the image—the sky behind you appears to be in motion. Additionally, it serves as a focus control mechanism; the viewer’s attention is automatically drawn to the subject, as the swirling sky acts to pull the gaze directly toward the center. Your photograph is no longer just a simple image; it transforms into something truly unique. This is precisely why this effect acts as a “scroll-stopper”—it compels people to pause and take a closer look at your photo, thereby boosting its visibility and engagement, and increasing its potential to go viral.
Why Doesn’t your Image Actually Go Viral?
So, where does the problem lie regarding this “viral effect” of yours—specifically, why doesn’t it actually go viral? The mistake people often make is simply pasting the prompt and leaving it at that. While the effect does indeed get applied to your photo—and you might see a result—you’ll notice that clouds or random elements have spread across the image, and your face has effectively dissolved into the background. This is where you need to carefully manage every detail. For instance, you won’t get a perfect result on your very first attempt; you will likely need to make two or three tries. Furthermore, you must pay special attention to your face to ensure it matches the original 100%. To achieve this precise match, the reference photo you use must clearly and accurately display your face. The lighting on your face in that reference image should be excellent; if you use a high-quality photo, you are guaranteed to get a great result.
When does a difference in results become apparent?
It happens when you fail to distinguish between a “normal” prompt and a “smart” prompt. First and foremost, understand that with a normal prompt, your facial features are not defined or articulated with sufficient precision. However—as I have demonstrated here by explicitly detailing every element within the prompt—your face will remain 100% consistent and true to form. In contrast, a normal prompt might yield random, unintended elements—such as clouds—whereas with this specific prompt, you will achieve the exact visual effect you desire. A normal prompt often results in a photo that looks distinctly artificial or “fake”; conversely, the smart prompt we have intelligently crafted for you will transform your image into something with a truly cinematic and realistic aesthetic. Consequently, your photos will be produced at a quality far superior to that of standard outputs—making them not only high-quality but also highly shareable and viral-worthy.
Use the provided reference image and STRICTLY preserve the original person’s face, body, pose, skin tone, clothing, and identity exactly as it is. Do not change or recreate the person.
Do not modify the foreground, grass, trees, or background landscape. Keep everything identical.
ONLY modify the sky area by adding soft, dreamy swirl cloud patterns. The sky should have smooth spiral shapes with pastel blue and warm orange gradient tones, glowing softly like artistic clouds. The effect must blend naturally into the existing sky.
Ensure the lighting remains realistic and consistent with the original photo. No changes to subject shadows or colors.
The edit should look like a real photo with a surreal sky — cinematic, high quality, ultra realistic.
No face change, no body change, no extra elements.
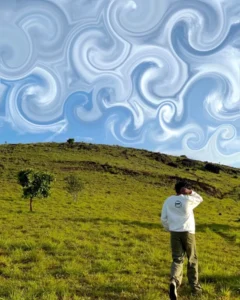
Use the provided reference image. Keep the subject, pose, background landscape, lighting and composition exactly the same. Do not change the person or foreground.
Only modify the sky by adding a dreamy abstract swirl pattern effect. The sky should be filled with soft glowing spiral shapes, smooth circular swirls, pastel blue and warm orange gradient tones, inspired by surreal and artistic cloud formations. The swirls should look like soft airbrushed clouds, slightly luminous, blended naturally into the sky.
Maintain realistic lighting and shadows on the subject. The effect should look cinematic, high-quality, and naturally integrated — not cartoonish or overly sharp.
No changes to subject face, body, clothes, or ground.
High resolution, ultra realistic, cinematic color grading.

Enhance the image by introducing a surreal swirling effect in the background, featuring smooth, fluid spiral patterns and subtle vortex-like motion in open areas such as the sky or foliage. Ensure the main subject remains completely sharp, natural, and undistorted, with full preservation of original facial features and proportions. Maintain the original composition while seamlessly blending the realistic foreground with a dreamy, abstract background. Apply cinematic lighting with soft glow, volumetric light rays, and enhanced depth. Use shallow depth of field for subject isolation, and render in ultra-realistic quality with high detail and 4K resolutio
Enhance the image with a surreal swirling effect in the background, creating smooth fluid spiral patterns and vortex-like motion in the sky or open areas. Keep the main subject completely sharp, natural, and undistorted. Preserve original composition while blending realistic foreground with abstract dreamy background. Add cinematic lighting, soft glow, depth, volumetric light, high detail, ultra realistic, 4k, depth of field
How To Create Image With Prompts
Now, let’s look at how to create photos like this. First and foremost, you need to understand that creating such images requires the use of an AI tool. Since the goal is to generate a result based on your own photograph, our best option is to utilize Google Gemini. This will ensure that a fantastic, personalized image is generated for you. So, what is the process? First, copy the specific prompt you intend to use. Next, open Google Gemini and upload a high-quality photograph of yourself—one where the resolution and overall details are crisp and clear. Once uploaded, simply paste the prompt into the interface and hit ‘Generate.’ Within just a few minutes, you will see that your customized image has been successfully generated and is ready for use. You can expect to receive excellent results and a high-quality image through this method.
Conclusion
I hope you understand the edit. I’ve tried to present it well and explain it to you in a simple way. Please let us know how you feel about this edit in the comments. If you like it, please share your opinion with us.