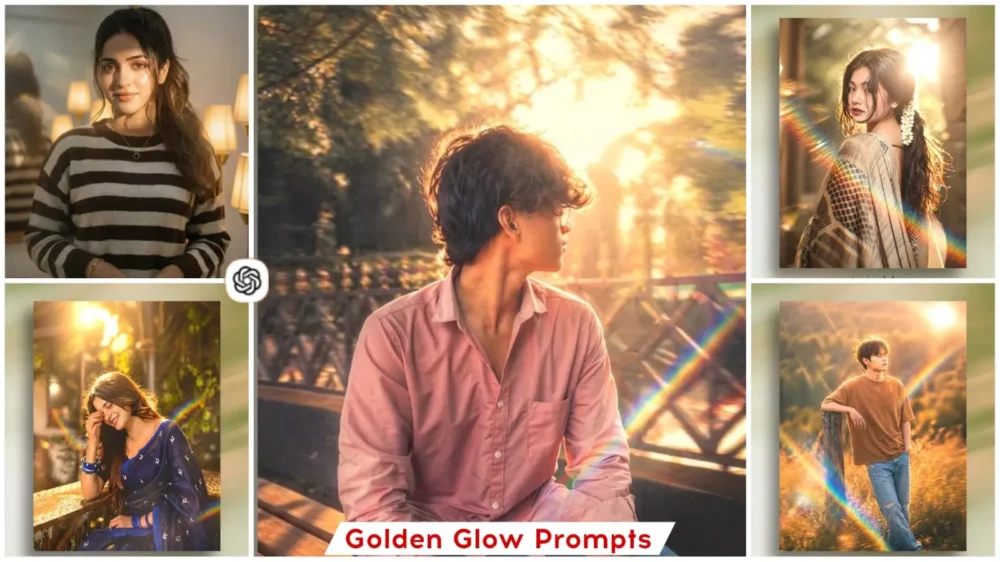
Realistic Sunlight Ai photo Editing Prompts – If you use Instagram, you have likely noticed that photos featuring realistic sunlight—specifically those capturing the “Golden Hour”—tend to go viral. These images grab the most attention, drawing people in and compelling them to pause and admire the shot. In such photos, the subject is bathed in soft, golden-hour lighting, exuding a completely natural glow, while the background often takes on a slightly dreamy quality. The overall result is a truly cinematic photograph. However, the challenge is that not everyone can create such images; people often struggle to capture photos of this caliber. After all, not everyone is a professional photographer. But since you are visiting our website, there is no need to worry, as we will share methods that allow you to create such stunning photos with remarkable ease. By following these steps, you can transform your images into professional-quality photographs.
Details Of Realistic Sunlight Ai photo Editing Prompts
So, what exactly constitutes “realistic lighting” in editing? As I mentioned earlier—that I would teach you how to edit with realistic sunlight—this doesn’t simply mean adding a splash of color or a generic light effect to your photo. Rather, it involves carefully considering specific details: from which direction the light is originating, where the reflections will fall, where the skin will naturally glow, how the overall colors will be balanced, and how the background will seamlessly blend with the subject. It is only when all these elements are perfectly balanced that our photograph truly achieves a realistic look. This process handles all these aspects flawlessly; let me show you exactly how it works.
How Does It Interpret Lighting, Colors, And Similar Elements?
ChatGPT acts as a tool for Google-based photo editing, enabling you to create absolutely perfect images. It operates using “prompts”—much like one would on a PC—where specific parameters are defined, such as the direction of the lighting and the time of day. For instance, the “Golden Hour” is a particularly popular choice, as it typically yields stunning photographs. Furthermore, the tool allows you to visualize and incorporate specific atmospheric conditions into your images. Crafting the right prompt is crucial; if you use an incorrect or imprecise prompt, you will not achieve the results you desire. Therefore, this article provides a selection of prompts accompanied by corresponding images, which you can utilize to generate high-quality, impressive photographs.
How To Select The Right Photo:
This requires a bit of understanding—specifically, whenever you are generating images or utilizing a reference photo, making the correct selection is crucial. Here is how you should choose a photo: opt for one taken outdoors that features a direct, front-facing view of your face—avoiding side profiles or angled shots. It should have a simple background, and the subject—that is, the person in the image—must be clearly visible. Conversely, you should avoid using photos where the lighting is overexposed or where there are excessively dark areas. If you use such images, you will not achieve good results, and it may even prove impossible to generate the desired photo.
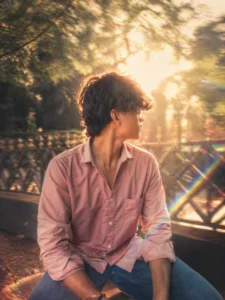
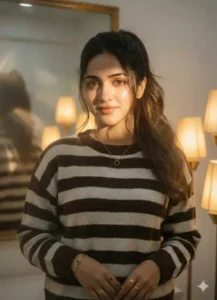
Transform this image into a cinematic, dreamy editorial portrait with soft golden-hour lighting. Apply strong
backlighting from the sun positioned behind the subject, creating a natural rim light around the hair and shoulders.

Add a realistic prismatic rainbow lens flare diagonally crossing the frame, with subtle chromatic dispersion and light streak bloom.

Enhance depth using shallow depth of field (f/1.8 style), keeping the subject sharp while softly blurring the
background into a creamy bokeh. Introduce slight motion blur in the environment to create a dynamic, ethereal
movement effect while keeping the subject stable.

Apply warm, soft color grading with pastel tones, slightly lifted highlights, and gently faded shadows for a filmic
look. Add subtle glow diffusion to highlights (especially around light sources and skin), creating a soft, dreamy haze
without losing detail.

Skin tones should remain natural and clean with soft smoothing, no plastic effect. Maintain realistic textures while
enhancing lighting contrast.

Overall style: cinematic photography, luxury fashion editorial, dreamy atmosphere, natural light realism, ultra high
resolution, 4K clarity, soft cinematic grain.
A high-resolution, realistic 4k cinematic photo of the young woman from the image at the beach during golden hour. She has the same facial features, dark hair, and soft pink lips. She is smiling playfully with her eyes gently squinted, expressing natural joy. Her wind-blown dark hair is catching the warm sunset light. She is wearing a pista crochet lace top over a black inner layer, with delicate layered gold necklaces and small gold earrings.
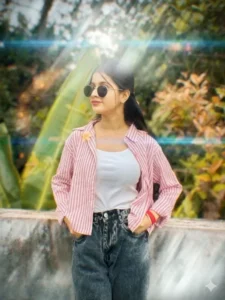
Add a cinematic anamorphic lens flare to this uploaded photo while keeping the subject and composition entirely intact. Identify the brightest light source in the image — whether it's the sun, a window, a street light, a lamp, or any bright highlight - and generate a realistic horizontal anamorphic lens flare emanating from that light source, stretching horizontally across the frame. The flare should have the characteristics of real anamorphic glass: a long horizontal blue-cyan streak stretching across most of the frame width passing through and beyond the light source, secondary smaller warm amber and magenta flare elements scattered along the horizontal axis, and a soft overall haze in the area immediately around the light source that gently reduces contrast. The overall look should feel dramatic, filmic, cinematic, and beautifully shot through a high-end cinema lens.
How Can You Create This Editing Using Chatgpt
Now, how exactly can you create this type of edit? If you wish to produce a photo like this one—as I previously explained—you will find the specific prompt required for this style within the accompanying article. Simply copy that prompt and open ChatGPT. Once inside ChatGPT, click on the ‘+’ icon to select and upload your chosen photo. Ensure that the photo you select is of good quality. Now, keep in mind that this tool does not completely alter the entire background or scenery; instead, it focuses on adding sunlight effects. If you were expecting it to replace the existing background with something entirely different—such as a luxurious setting—then this particular prompt is not designed for that purpose. You will find that it primarily applies sunlight effects and natural-style edits, resulting in a perfectly finished photograph.
Conclusion
We hope you enjoyed this edit. I have tried to incorporate some unique and distinct elements into it so that you can consistently create great photos. If you enjoyed creating these images, please let us know in the comments; we will bring you even more amazing edits to help you create even better photos.